Here's a cute little print-and-cut project that will provide a cheery bit of extra storage space. The back's flat - hang it on the wall from a picture hook, or loop it around a doorknob.
Here's your free wall pocket:
WallPocket.pdf
WallPocket.studio3
WallPocket.svg
To make up, print on to photocopier card, cut out. Score and crease the folds. Glue the liner inside the pocket. Glue the side seam and base. Glue on the reinforcements. Add a hanging loop if required.
You can also glue two pockets back-to-back, for some desktop storage:
Print a paper pocket! :)
Tuesday, 25 July 2017
Monday, 17 July 2017
Cut & Create Paper Mosaics. Review.
Craft Mosaic-by-Number Artworks with Paper Tiles,
Scissors, and Glue
By Chiharu Rosenberg
Race Point Publishing, an imprint of the Quarto Group 2017
Paperback kit, £12.99 UK/$19.99 US/$25.99 CAN
ISBN 978-1-63106-284-1
Star rating: ****
This is an appealing and thoughtfully-designed new spin on
the colouring book trend. It is much more hands-on – and has more of an
immediate appeal for papercrafters. It
puts me in mind of the Colorforms toys I
so loved as a child. What you get is the components required to assemble nine lush, nature-themed paper
mosaics, designed by Chiharu Rosenberg, a mosaic artist born in Japan and a
graduate of the Nihon University of Art. There are 9 pre-printed project
templates on thick card, 35 sheets of solid-coloured and patterned paper, plus a detailed how-to book.
The project cards have a few key design elements printed
full-colour, plus numbered outlines for the mosaic tiles. The accompanying
paper sheets have custom-designed solid and plain designs with numbered mosaic
tile shape outlines printed on the flip side. You cut out the tiles and
glue-stick them onto the project card. The assembly process is meant to be
methodical and calming. Complexity level is labelled – beginner, intermediate,
advanced. All you need to supply are
scissors (or craft knife), a glue stick, tweezers, envelopes for sorting the
pieces – and some design time (ideally accompanied by restful music).
The upfront info – how to go about the process – is accessible
and well thought out. The intro chat for each project is friendly and
conversational.
The projects are Frog
in Summer Rain, White Lilies, Flying Home (lovely birds-eye-view
landscape), Night Jungle (with hummingbird amidst foliage), Mermaid, Fox in the Forest (Klimt-like patterning), Little Egret, and Cherry
Blossoms.
Cut & Create Paper Mosaics would make a super summer hol activity for an older child (just don’t
undertake the projects in a breeze or fan-cooled room! :D). This is a fun idea which I have not seen elsewhere. It would be great to see further themed titles in a series.
Note: I was supplied with a review copy of this title.

Wednesday, 12 July 2017
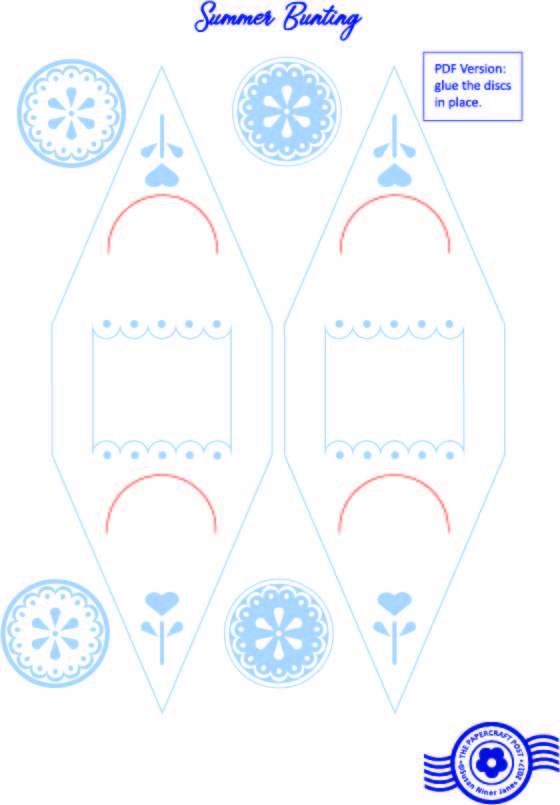
Summer Party Bunting
This sweet summer bunting is inspired by broderie anglaise (eyelet lace) - clock the cut-outs and centre motif. It is double-sided, so is can be strung across the patio or room for best effect. Each flag is folded in half and slots together. The pennants would look great with ribbon streamer spacers in between.
I have given you two versions - a digi-cut version and a hand-cut PDF.
Here's your free summer bunting:
SummerBunting.pdf
SummerBunting.studio3
SummerBunting.svg
For the PDF version, print out the template, cut out the banner (just the outline - no fiddly fine cuts - the design is printed) and the discs, carefully cut the arc-shaped slots with a craft knife.Glue the discs inside the banner. Slot to assemble.
For the digi-versions, the discs motifs belong inside. If you want the front of the banner to be blue, print a blue page first, then print the banner design on the flip side.
Hope you have a delightful summer party! :)
Subscribe to:
Posts (Atom)