Showing posts with label paper pleating. Show all posts

Monday, 23 November 2015

Colour Block Pleated Globe Ornaments

Less is more! Today I have a colour block variation of the Pleated Paper Globes, as seen in yesterday's tutorial. This style really accentuates the starburst effect at top and tail.
 
Here are your free printable templates:
 
I have given you .pdf printables and a .studio file. You can print and cut the globes if you have a Silhouette Cameo or Portrait, or you can print, emboss, and cut the globes if you have a Silhouette Cameo.

However you make them, happy pleating. Enjoy making your seasonal decs!


Monday, 9 November 2015

Washi Accordion Envelope Bunting Tutorial


Storage buntings make so much sense – they are decorative and functional – and they cleverly make use of unused wallspace. This pretty print-and-cut bunting is made of accordion envelopes decorated with patchwork motifs. The patterned shapes are cut out from Silhouette Adhesive Washi Sheets – simply cut out with your Silhouette machine, peel them off the backing, and affix them on to the pre-printed design outlines. 


Each envelope has a pleated accordion inset expandable space for stashing stuff. (To do a quick study on how to fold them, check out my previous blogpost – and Paul Jackson’s new book, Complete Pleats.)

The envies are also fun as solo hanging envelopes – the choice is yours.

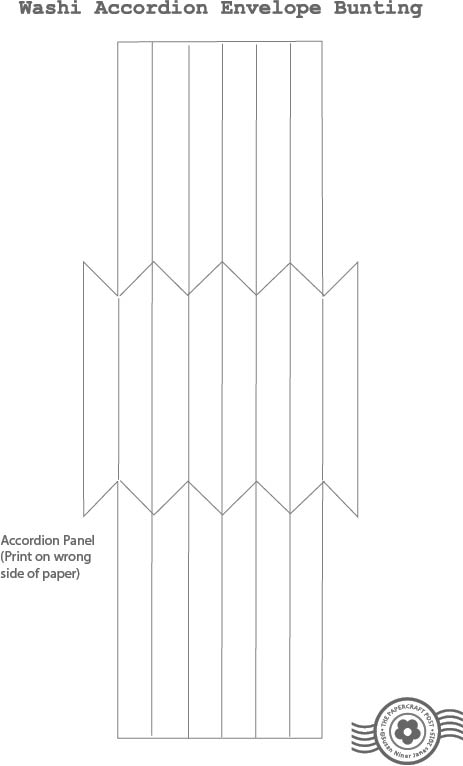
Here are your free design files – it looks like a lot of stuff, but the envelope construction is fun and do-able. There are files for the accordion panel, for the envelope (in three colours), and for the washi shapes.
AccordionPanel.studio3 
GreenWashiEnvelope.studio3 
YellowWashiEnvelope.studio3 
RedWashiEnvelope.studio3 
WashiShapes.studio3 

AccordionPanel.pdf 
GreenWashiEnvelope.pdf 
YellowWashiEnvelope.pdf 
RedWashiEnvelope.pdf 
WashiShapes.pdf 
.


Washi  Accordion Envelopes


You will need:


A 4 Photocopier card, cream

Coloured copy paper (Paperchase Spectrascope pad, A4)

Joy Craft adhesive Hook and Loop dots

3mm-wide ribbon

Tacky PVA glue, cocktail sticks

Fine-point embossing tool, metal ruler


1 Cut out all the envelope components. For each envelope, you need the envelope Front Flap/Back piece and the Envelope Front piece, plus two reinforcements cut out from cream-coloured photocopier card (print-and-cut with a Silhouette machine); one accordion panel cut from coloured copy paper (print-and-cut with a Silhouette machine); and adhesive washi cut-outs cut out from Silhouette Washi Sheets (cut out with blade on no.1 setting). (Three colours of envelope are provided.)

(Note: if you are lucky enough to have a Silhouette Curio and the large base, then you can emboss the fold lines of the accordion panel using the fine embossing tool.)
2 Using a fine-point embossing tool and a metal  ruler, score the fold lines on the accordion panel. Crease the folds – fold the horizontal folds both ways and prime the zigzags so they will fold easily. Next, fold the accordion panel into a U-shape, following the fold lines. Fold from the right side of the paper (the unprinted side) - it is pre-creased, so you can clearly seee the folds. The direction of the fold reverses at each “V”. Refer to my previous blogpost about pleating for more specific pleatings how-tos. (To learn all about pleating, consult Paul Jackson’s new book, Complete Pleats.) Glue down the little tabs at the bottom corners of the accordion panel, front and back (use tacky PVA glue).


3 Glue reinforcements on to the holes on the envelope back. Use tacky PVA glue.

4 Time to add the washi appliqués. Peel off the washi shapes from the adhesive backing and stick them onto the corresponding shapes on the printed design on the envelope front flap. Fun!

5 Glue the envelope front onto accordion panel, edges aligned (use tacky PVA applied sparingly with a cocktail stick). Next glue the envelope back/front flap onto the free side of the accordion panel, edges aligned. Crease the flap on the front fold. 

6 For the closure, stick on self-adhesive hook and loop dots (loopy side on the envelope front, fuzzy side on the envelope flap). To adhere, fasten the dots together, stick in place on the envelope front, then lower the flap in place and smooth down. Prise apart to open.

7 Thread ribbon through the holes in the envelope back. You can choose to make either a bunting or a solo hanging envelope.

Note: the .pdfs are for those of you who don't yet have a digital cutter. You can colour in the patchwork shapes with felt-tips or coloured pencils, or you can cut appliqué shapes from coloured paper and glue them on.


Thursday, 29 October 2015

Pleated Paper Party Lanterns Tutorial

This festive party bunting is a fun papercraft challenge to make. Once you've cracked folding the concertina box - which is the body of the lantern - you've just got to add the lantern top and base (the "hats") and join the lanterns with paper chain links.

Here are your templates:
SquareConcertinaLantern.pdf 
SquareConcertinaLanternCurio.studio3 

HexagonalConcertinaLantern.pdf 
HexagonalConcertinaLanternCurio.studio3 


I have provided you with templates for a square lantern and a hexagonal lantern - but you can make the bunting with just the square shape if you wish.
My pleating binge has been inspired by Paul Jackson's super new book,
Complete Pleats:
Concertina Lantern Party Bunting Tutorial

1 The pic above shows all the pieces of one lantern. The lantern body is cut out from copy paper-weight coloured paper (I used a Paperchase Spectrascope A5 pad). The "hats" are cut from thin black card.

If you are lucky enough to have a Silhouette Curio machine, then it will emboss the fold lines for you! Simply cut by colour. (Blue = fold, Red = cut.) (When embossing with the Curio, you must put the shape to be cut on the cutting area for the cut lines to be visible.) 

(If not, use the .pdf version and print the fold lines on to the wrong side of the paper, then set to and mark them with a finepoint embossing tool held against a small metal ruler.)

2 Pic above shows how to fold a concertina box - the lantern body. It is important to "prime" the fold lines - that is, pre-fold them, so they fall into place when you fold them for real. So - fold all the horizontal fold lines both front and back (this is a "universal" fold according to Paul Jackson). Also pre-crease the zigzag Vs. 

The secret to the folding is that the direction of the accordion pleats reverses at the Vs. If you press each V to fold it - kind of like popping bubble wrap (!) - the folds will fall into position and almost fold themselves!

Do a dry run of the folding on scrap paper. Practice makes perfect!
3 Pic above shows how to assemble the concertina box. It is seamed at the centre of one side to make a tube. You must unfold the creases to join the seam ( I know!). Use a piece of double-sided tape on the short side of the rectangle. Overlap the seam to make a tube. Once you've made the tube, gently coax the folds back into position. Tah dah! A square concertina box.
4 Time now to make the "hats" to cap the concertina box. Pic above shows how it is done. The band fits into the brim. For the top, add the looped handle. For the bottom, reinforce the brim bits with the holes, then tie on a tassel. The tassel is made out of craft thread in a colour to match the concertina box. Wind the tassel around a 6cm (2-1/4in) piece of card. (For how to make a tassel, I've got a tutorial - click on the link.)
5 Okay - it's the homestretch. Time to stick the "hats" on to the top and bottom of the concertina box. Just stick double-sided tape onto the concertina box top and bottom edges (whee- the box collapses right down flat!). Next, just stick on the "hats" with edges aligned.
6 To complete the bunting, simple join the lanterns with paper chain links.

If you want a further challenge, I have provided a pattern for a hexagonal lantern. It is made in the same way as the square concertina lantern - just slightly more fancy-folding. (When you glue on the "hats" to the hexagonal lantern, make sure that the sides are aligned top and bottom.)

Enjoy the fancy folding! When you've mastered the concertina box, you will be proud of your new pleating skills.