Tuesday, 29 January 2013

Papercrafted Washi Tape Dispensers Tutorial


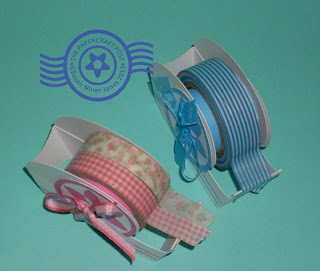
Wonderful Washi Tape! It is an affordable gift of choice for papercrafters. Today's blog is a tutorial for making papercrafted Washi Tape Gift Dispensers. These pretty dispensers have a life beyond gift presentation. Today's freebies: printable pattern templates for the dispensers.

Here are the downloads:
WashiTapeDispenserBlue.pdf 
WashiTapeDispenserOrange.pdf
WashiTapeDispenserPink.pdf

Suggested cardstock for all methods: Bazzill or American Crafts. Print the designs on A4 cardstock. If using a Silhouette machine, remember to turn on the registration marks.

Here's how-to: 
1) Prep the dispenser pieces. Hold an embossing tool against a metal ruler to mark the fold lines, then crease the folds. Glue reinforcements

behind dispenser holes, tape reel sides, and buttons.  
2) The pic above shows how to use the measuring guide to divide the dispenser cutting edge into thirds.

3) The pic above shows the first section of the dispenser cutting edge which has been folded to the inside and glued down. Next, turn down the folded edge to bottom of the dispenser and glue it down.


4) Turn the dispenser to the right side. Cut a piece of serrated card to fit the dispenser cutting edge. The serrated strip has been recycled from a box of plastic wrap. Glue the strip onto the dispenser, slightly overlapping the edge. Tacky glue is recommended.

5) The pic above shows how the serrated cutting edge projects above the paper edge.
6) Glue the tab to complete the dispenser body.


7) Above, a pic of the completed dispenser body.
8) Time to assemble the tape reel. Shape the reel barrel around your fingers, gently curving it. Glue the tab to form a ring.


9) To complete the tape reel, apply glue to the tabs and glue a reel side onto each side of the barrel, to make a drum shape.

10) Insert the reel into the centre of the Washi Tape roll.
11) If you have not already done so, glue a reinforcement onto the wrong side of each button.
12) Cut a 35cm (14in) piece of narrow ribbon and thread it through the button holes. Place half the ribbon on each side.
13) Thread the ribbon tails through the eye of a tapestry needle. Place the tape reel inside the dispenser. Important: Make sure the free end of the Washi Tape faces the dispenser cutting edge. Draw the ribbon through all the holes, to the opposite side of the dispenser.


14) Thread each tail of the ribbon through a hole in the button.

15) Tie a bow and trim the ends. The Washi Tape Dispenser is now completed.
Above, a pic of the Washi Tape Dispenser from the other side.

There's a shaped grab handle at the back.

Above: if you enlarge the pattern, then you can fit two tape reels in a dispenser. You may have to adjust the size of the tape reel and dispenser to fit your reel of Washi Tape - not all reels are the same size. Do it by enlarging or reducing the pattern template on a photocopier.
Roll call!


Big thanks to Michael and Leah for taking the pics.


Sunday, 20 January 2013

Jane Austen Valentines... Free Printables


It is the 200th anniversary of the publication of Jane Austen's Pride and Prejudice... much deserved hoopla in the media. I sheepishly admit that I have not read Pride and Prejudice (it's on my Kindle!...) - but I have read and enjoyed all the other novels, so I can enthusiastically join in the celebration. So... here are some Valentines inspired by Jane Austen... and Regency style. 

There are free downloads for the Valentine Embroidery Hoops and for the sentiments. The font is... Jane Austen (which is available free from Dafont.com). Here are the printables:

ValentineSentiments&Tags.pdf 
EmbroideryHoopValentinePrintables.pdf
EmbroideryHoopCuttingGuides.pdf 

I have given you three files: one for the embroidery hoops, one for the sentiments, and one file with trace-around guides for cutting around the hoops. You don't really need the last file if you have a steady cutting hand - but it is there if you want it.

The flowers are made with Tonic Studios Petal Pairs punches:
The punch in the centre - with the heart-shaped petals - is from Petal Pairs Box Set 4 (883e)... ideal for making Valentines! The punch on the left is from Petal Pairs Box Set 5 (884e). And the punch on the right, which I used for the leaves, is from Petal Pairs Box Set 3 (882e). To give the flowers - and the embroidery hoops some lift, I used 3D Foam Squares from Scrapbook Adhesives.

The embroidery hoops are backed with doilies cut using Tonic Studios Simplicity dies: Daisy Circle Die (Item 229e) and  Daisy Square Die (Item 230e).

The little buds are made with the Petal Pairs heart-shaped petals punch. Fold each petal to the centre, then tuck them in consecutively... tucking the last one under. I shaped the flowers on a foam mat using a tool. 

The gingham and striped backing papers have a Regency look. They are from Craft Creations. The ribbons are from Craft Fairy.

I'm not giving specific how-tos for the Valentines. Do it your way using the printables, punches, and dies. I'm sure your Mr. Darcy will be delighted to receive your handcrafted Valentine!

Thanks to Leah, for taking the pics.

Thursday, 17 January 2013

Papercraft Sewing Accessories Gallery

Quilter's dolly and spools.
Teabag-style thread cards and storage baskets.

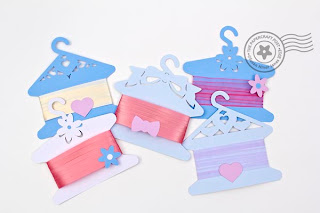
Ribbon hangers. Gift presentation idea!
Pin storage: wheels or fans.
Ribbon winders, Flower Garden Ribbon Reels (and basket).
Button storage. The mini cigar box has compartments, like a printer's tray.
Storage caddy and bead trays.


Cantilever sewing box and spools. Yes, the spools are papercrafted!

Today's blog post is part of my Papercraft Fabrications strand - papercrafted sewing accessories: it makes so much sense to papercraft practical, pretty projects that have a life beyond gift presentation. No how-tos here - just plenty of inspiration.

I have a few more ideas for papercrafted sewing accessories, and I'll be posting them on the blog.

Friday, 4 January 2013

Hooray for Paper Patchwork!

The look of a patchwork quilt... in a jiffy.
The folded triangular edging is called Prairie Points (or Somerset Patchwork).
You can engineer where the Prairie Points fall to make fancy closures.
Double layer of Prairie Points.
Get the point! Free Prairie Point download below.
Paper Patchwork is the ideal way to use up small quantities of paper from your stash. It looks great in mixed prints. A dead ringer for its fabric-crafted counterpart. These cards have a couple of quick-make secrets. First of all, the traditional quilt block designs are made using my new papercraft template for Hot Off The Press, Paper Patchwork HOTP 7411. Instead of cutting out lots of small pieced shapes, as for fabric patchwork, the quilt blocks are made of larger layered shapes. The shapes for the top layer of the motif are linked all-in-one to speed the cutting process. Here's the template:
The other secret is in the Prairie Point borders, which are easy to make from notched paper strips, download below. There are also downloads for the patchwork house motif and the card sentiments. Here they are:
PrairiePoints.pdf
PrairiePoints.svg 

LabelsPaperPatchworkCards.pdf

Here's how to make the Prairie Points:
A small metal ruler makes accurate folding a cinch.
1) Cut out the Prairie Point strips. The vertical snips are the most important bit. Next, fold the diagonals using a metal ruler as an alignment guide (it helps you make the bases of the triangles level).
2) Next, glue the tabs on the triangles. A tiny dab of tacky glue does the job. That's it. Your Praire Points are done. As you can see, there's a border strip below the triangle points. You can either slip the border strip underneath the edge of your card, or you can position it on top of the card front and camouflage the strip with contrast trim. The speedy way to attach the Prairie Points to your card is with d/s tape.

Here's how to make paper patchwork, pronto:

1) Cut out the shapes.
2) Layer the shapes. You can glue them with tacky glue or fix them together with d/s tape. Camouflage the link in the middle of the uppermost patchwork shape with a smaller contrasting shape - or with one of my printables. Simple! The finishing touch: mock stitching drawn with a Zig Millenium fine-point pen.
Make a dinky card from just one patchwork block!

The printed papers are from a 6 x 6 paper pad: Times & Seasons from Echo Park Paper Co.

The HOTP template also has the Orange Peel pattern - which can be used to make mock Cathedral Window patchwork. And a hexagon shape, which can be used to make the Grandmother's Flower Garden quilt design. But that's another post...