Saturday 31 August 2013

Flower-Top Gift Boxes

These petite gift boxes are topped with a pretty folded flower. The lid slots on and off. Make a bunch!

Here are your free downloads (there are two different prints for the boxes):
XmasFlowerGiftBoxA.pdf 
XmasFlowerGiftBoxB.pdf 

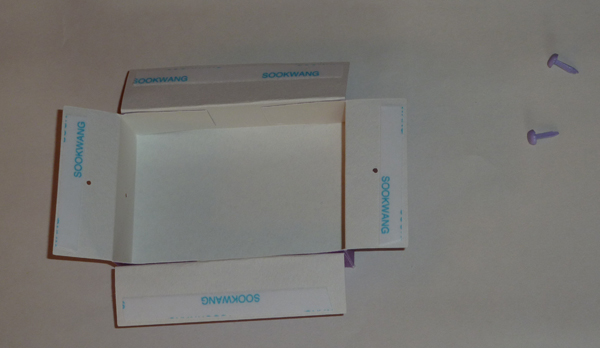
Your download looks like this:
Making the box is easy. Score the folds at the base and the side flaps.
Join the adjacent sides. Tie the gift tag on through one of the box slots. To put on the lid, slip the tabs into the slots one by one (ease the last tab in gently).

Here's how to make the folded flower:

1. Cut the flower out and score the folds. Fold mountain folds (green arrow) at the base of each arm and valley folds (red arrow) at the base of each small flower petal (the teardrop shape at the top of each arm).

 2. Fold the first arm inwards to the centre of the base pentagon.
3. Fold the second arm to the centre, matching the points at the base of each petal.
4. Third arm to the centre.
5. Fourth arm to the centre. Swing it around and over.
6. Fold the fifth petal inwards, swinging it over and around. Make sure all the petal points match in the centre. Fluff up the petals to make the flower really pop - it's 3-D, after all.
Flower back.
Flower front.

Stick the flower onto the lid with a sticky dot (Dodz by 3L).

You can, of course, use the flowers as embellishments on cards, scrapbook pages, and other gift wrap treatments.


Tuesday 27 August 2013

Patchwork-Look Christmas Decorations

Each garland link looks like a patchwork wreath.
An easy-fold paper patchwork star.
Patchwork paper chain motif. 
More headstart holiday decs today. Easy-peasy free downloads with the cosy look of patchwork. There's a paper chain garland: each link looks like a patchwork wreath. And a pretty star flower in mixed prints to fold. Punch a hole, add a hanging loop: nearly instant dec. Or make up smaller stars as giftwrap and card embellishments.

The downloads look like this:

Here are your free downloads:
PatchworkXmasWreathLinks.pdf
XmasPatchworkStarFlowers.pdf 

You can cut these out by hand easily.

Patchwork Garland
One link. Fold it in half.

This garland is a twist on a traditional chain link garland. Cut out as many links as you think you'll need.

Fold each link in half and pass it through the centre hole of the adjacent link. You'll have to scrunch the wreath a bit to fit it though - I like to roll it - you'll get the hang of it. If the link gets bent a little, just smooth it out. No worries - it's on the back! 

Make sure that adjacent links have different patterns. The red patchwork patterns and the bows differ from link to link. That's it!
You can tie a ribbon loop to each end for hanging.

Patchwork Flower Star Ornament
To make up the folded star, simply cut it out. Crease each arm at the base - this makes a centre pentagon. Fold down the arms one by one, going clockwise. Tuck the petals under the previous one as necessary. Fluff up the petals to make them really dimensional. You can punch a hole at the top and add a hanging loop if you wish.
  

Sunday 25 August 2013

Button Boxes


I have buttonmania. I've had it ever since I was a kid - I used to love playing with the buttons in the box with the picture of a swordfish on the lid. These days, I like to give buttons as a gift to my sewing-enthusiast friends. Today's project: gift packaging for buttons. Choice of mini-milk cartons or matchboxes. Either way, easy make.

I have been studying how to design pattern repeats on the computer - and these projects are my training sessions - and you guys are my guinea pigs. I did manage to tackle a fairly complicated pattern - so that's progress.

There are mini-tutorials to accompany the free downloads.

ButtonCardMatchboxLtBlue.pdf
ButtonCardMilkCartonLtBlue.pdf
ButtonPrintMilkCarton.pdf 

Button Box Milk Carton Tutorial

1. Milk Carton components. The fold lines have been scored. The triangular folds on the milk carton sides can easily be scored using the crosswise fold and the notch at the top as guides. On your printout sheet, there are two notches to either side of the milk carton. These are your guides for marking the fold across the top part of the carton.
The lines on either side of the milk carton are score guides.


2. Join the long side flap to assemble the box (use d/s tape or tacky glue).
3. Interlock the base folds. Fold them down one-by-one. Tuck the last one under.
4. Add a base seal to secure the folds. Attach it with a glue dot. (I used a Dodz by 3L.)

5. Pinch the side triangles in. You need 30cm (12in) of 6mm (1/4in) -wide ribbon for the bow. Thread it though the holes starting from the front. Catch in the tag loop as you thread the ribbon through the side.


6. Tie a bow at the front, trim the ends. (Of course, fill the box with buttons before you do so!)

Button Box Matchbox Tutorial
1. Above, matchbox pieces cut out and prepped. Pic shows the inside of the matchbox drawer with d/s tape applied. You also need to apply d/s tape to the right side of each corner tab.
2. Pic above shows matchbox drawer with adjacent sides taped. Next, fold in the flaps and insert the two brads (the drawer pulls).
3. Above, drawer assembled. Tape applied to wrong side of the matchbox wrap.
4. Wrap the wrap around the draw before you tape the seal - this helps you get a good fit. You may need to adjust the size of the drawer depending on the thickness of the cardstock used. Enlarge or reduce by a few percentage points as necessary. You can tie your gift tags onto one of the brads for gift presentation.
In case you were wondering, the lovely buttons that I used as props are Jenni Bowlin Vintage Sew-On Buttons, which I have been hoarding. (I knew they'd come in handy!)


Thursday 15 August 2013

Snowflake Gift Boxes

More festive gift packaging to craft while the sun shines. Snowflake Gift Boxes today. These hexagonal mini-boxes have borrowed the cute factor from ice cream tubs. The pronged tops fit into the slots to give a strong seal. There are two sets of printables, so you can mix and match the tubs, seals, and tags to your heart's delight. Go wild.

These pics show you all the different designs (no two snowflake boxes are alike... well, almost):

Here are your free digi-downloads:
SnowflakeGiftBox1.svg 
SnowflakeGiftBox2.svg 
SnowflakeGiftBox1.studio 
SnowflakeGiftBox2.studio 
SnowflakeGiftBox1.pdf
SnowflakeGiftBox2.pdf 

Of course, you can reduce or enlarge the boxes to suit the size of the contents.(The boxes shown here are shown same size, reduced by 20%, and bigged up by 20%.)

Making the boxes is pretty straightforward. Cut out the pieces. Score and fold the box base hexagon and side flaps. (I used an embossing tool held against a metal staightedge.) Make sure that any paper debris is cleared away from the box slots. Here's the important bit: gently bend the top of each side outwards, like so:
This step is very important because it provides the ease for the box lid prongs. Now all you have to do is glue adjacent sides. To seal the box, ease the prongs into the slots one by one. Take your time, especially around slots 3 and 4. You'll get the hang of it.

The tag is optional. Tie it on through one of the slots.

So much for Christmas in August. Time for an ice cream!