Friday 24 May 2013

Gum Wrapper Chains: Re-invented!

New-look links for gum wrapper chains. Cut-outs create peek-a-boo colour effects.
I've always liked the pretty zig-zag links of gum wrapper chains. Here are some new-look digi-cut shapes to play with. The folding is simplified
(compared to links fashioned from real gum wrappers) - you no longer have to fold the lengthwise edges inward - but the link shapes are fancier. Cut-out and cut-away designs create fascinating colour effects. The links are assembled in the familiar way.

These gum wrapper links have been made into bracelets: a fun half-term project. A tie of cord elastic fastens the bracelet and adds a bit of "give".

Here are your freebie file downloads:
GumWrapperChains.svg 
GumWrapperChainsSelect.pdf 

It is recommended to digi-cut this project. If cutting out by hand, go for the simplest link designs.

Here's a Gum Wrapper Chain Refresher Course:
1. Cut out the strips and fold each as shown. The ends of each strip are tapered for ease of assembly.
2. Insert the link between the loops and slide it towards the folded end of the receiving link.
3. The blue link in place. 
4. Insert the next link from the bottom upwards. Continue steps 3 and 4 to make the chain.
5. A repeating colour sequence can be very effective.

Of course, the simple shapes are easiest to interlock. Take your time when linking ornate styles.


To make the bracelets, trim the last links on either end and tuck them inside the penultimate links. Then punch a hole in the centre of the links at each end of the chain. Overlap the holes and tie a bow using 25cm (10in) of coloured elastic cord.

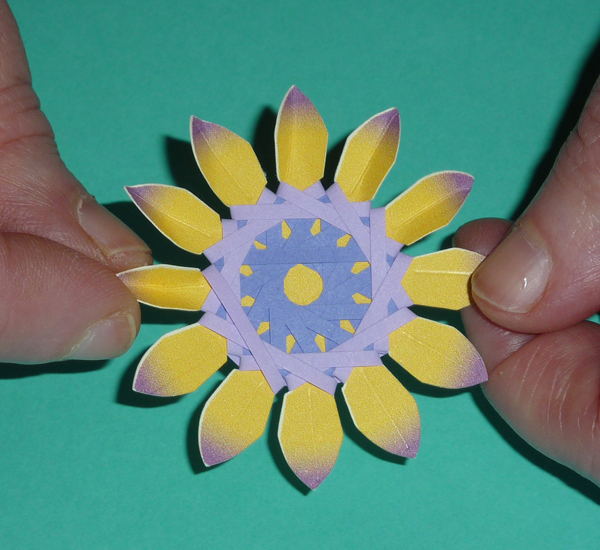
You can big up the links to make party paper chains. Or, you can weave four links together to make a medallion. Punch a hole in the top of the medallion and add a hanging loop.

Have fun playing the chain game!

Thanks for taking the pics, Leah!

Saturday 18 May 2013

"Hair Accessory" Paper Clips

These paper "paper clips" are inspired by hair accessories.
Holes are punched in the paper, and the clip fastens the layers together.
These are notecards. Here, the "clips" are decorative, not functional.
To fasten the notecard, stick on a Dodz above the paper strip. You'll be able to open and close the notecard without tearing it!
Smaller size of clips used to fasten paper "dogear-style".
More dogears!
To fasten the clip, you pass the strip through the holes in the decoration (and the paper).
Dogear fastening: punch holes as shown.
Dogear: the border is printed on the top right of the flip side of the paper.


The placement guide helps to position the holes.
Ribbon metrage gift presentation idea.
These pretty "paper paperclips" are inspired by hair accessories - the clasp-and-rod type used to fasten ponytails. To secure multiple sheets of paper, just punch holes in the paper placing them to correspond with the holes in the ornamental clasp. Weave the fastener stick under and up through all layers. VoilĂ ! The paper is fastened.

Here are downloadable digi-cut files for the "Hairclips":
Hairclips.svg 

I've given you an.svg for the hairclips and the hole placement guide (size them as desired), and studio files for two sizes of hairclips plus the papers to go with them. The larger clips fit the shaped pages/notecards. The smaller clips fit the dogear pages.

To make the clips, use a substantial weight of paper - like American Crafts cardstock. The paper must be flexible so you can weave the fastener strip through the paper layers.

These paper paperclips can come in very handy. Run out of paperclips? Just digi-cut some. Don't you just love being a maker?!

Thanks to Leah for taking the pics.


Sunday 12 May 2013

Mock Bottlecap Embellishments

Pretty paper medallions inspired by bottlecap charms.
Quick-make grad medal! (It's that time of year...)
Medals for other occasions.
Mock bottlecaps in metallic (left) or plain (right).
Here's the close-up: twist and tuck to make the "corded" surround.
Here's my take on the bottlecap trend: pretty papercrafted embellishments ideal for cards or scrapbook pages. There's a pretty cord-twist surround with an occasion-appropriate filler. Fun and versatile. Bottlecaps have the same irresistible appeal as buttons.

I've supplied digi-cut downloads for the bottlecaps. And a short tutorial to follow. Here are the downloads:
BottlecapEmbellishments.svg 
BottlecapEmbellishments.studio 

Now for the tut:
1. Digi-cut a bottlecap base and a print-and-cut insert disc. For the base, I recommend Centura pearl double-sided paper. The bottlecap base looks like a stylized sun. And each projection has a kind of a duck-bill - that's the bit that hooks over the edge.
2. Stick the liner disc onto the bottlecap base, centred, with a snippet of double-sided tape. Next, make the cord-twist look surround. Start anywhere. Simply fold-and-tuck the duckbill projections, going in an anti-clockwise projection. Make an angled fold to the left. Tuck the projection behind its neighbour. The notch sits on the edge of the disc.
3. Continue the fold-and-tuck procedure: the corded edge takes shape! So simple to do - and it looks like twisted cord!

4. Last one: fold the last tab under the first.
 5. VoilĂ ! The finished bottlecap embellishment.

Notes on the cards: to make the medals, just run a strip of paper (about 2cm/3/4in-wide) through a paper crimper. Trim the strip ends: dead ringer for a strip of grosgrain ribbon. Fold the strip in half and pop the bottlecap medallion on a little way below the top loop. Use sticky pads or glue dots to attach the bottlecap to the "ribbon".

For a more authentic bottlecap look, double-sided metallic paper is the best choice. But the bottlecaps look fine in plain paper. Prints are not recommended as the corded effect would be lost.

The bottlecaps make great mini-frames for photos or quilled miniatures. And of course, you can change the colourway or message to suit.

Papers: Centura pearlescent d/s for the bottlecap bases, cards: printed papers from Craft Creations and Wild Rose Studio (Annabelle's Meadow).

Thanks to Leah for taking the pics.


Friday 3 May 2013

Kaleido-Quilling FlowersTutorial

Quilling paper spirals make the flowers pop!
Fiesta colours!
Choice of big spiral flowers or minis.
I call this papercraft "Kaleido-Quilling". It is, of course, a new take on spiral thread-winding. Simply by using 2mm-wide quilling strips (that's the skinny size) instead of thread, the craft takes on a lively and fun appearance. The colour story takes on a new importance.


I've supplied free downloads for you. There are two different sizes of flower: 16-petal or 12-petal. Boths are quick to craft. There's another file with the greeting card "extras" - the leaves, vase, and tags. Here are your files:
Kaleido-QuillingFlowers.svg
Kaleido-QuillingExtras.svg
Kaleido-QuillingFlowers.pdf
Kaleido-QuillingExtras.pdf 

Digital cutters: these are print-and-cut files. I recommend using 160 gsm photocopier card for the flowers.

I have supplied .pdfs as well as cutting files because I always like to remember those of you who are not lucky enough to have a digital cutter (yet). But I have to say that cutting out the multi-petalled flowers would take some time. If cutting by hand, I recommend using a 1/8in circle punch at the base of the petals. 

Kaleido-Quilling How-Tos in a Nutshell:

Use 2mm-wide quilling strips.

Wrap the strip around the flower, advancing by the same number of petals each time you wrap. Go in a clockwise direction. Glue the beginning of the strip onto the flower back. 

If you run out of quilling strip, simply glue on a new piece onto the end of the old one. (Trim the working strip so the join is on the back of the flower.)

Tip: Make sure the quilling strip lies flat, not twisted. Take extra care at the "turns" at each petal base.

Successive rounds of quilled spirals are worked in exactly the same way. Choose a contrasting colour of quilling strip. The top layer must have fewer petals between wraps than the bottom layer. Example: 5-petal wrap, bottom layer. 2-petal wrap, top layer.

And here's your how-to tut:
1. Select the number of petals you wish to wrap and glue the quilling strip end onto the back of the flower. This is a 5-petal wrap.
2. This shows the end of the quilling strip glued onto the flower back. Use tacky glue applied with a cocktail stick.
3. Wrapping advanced by 5 petals. Round and round the quilling strip goes...

4. Wrapping progresses. The spiral pattern emerges!
5. Gluing a splice on the back of the flower. Cut angled ends for a streamlined splice.
6. The splice completed. Now resume wrapping from the front side, as usual.
 

7. Completed Kaleido-Flower. You know that wrapping is complete when there is "V-shape" at the base of each and every petal.
8. Back view of completed flower with quilling strip glued down.
9. You can opt for another layer in a contrasting colour. Make sure that the top layer "wrapping distance" is shorter than that for the bottom layer. Here: bottom layer is of 5-petal wraps. Top layer: 3-petal wraps.

10. Optional finishing touch: add dimension by scoring a centre fold on each petal.
11. Squeeze each petal to fold it. Also bend it upwards at the base.

It is pretty to use flat quilling paper for one layer and pearlescent quilling paper for the other.

All the Kaleido-Quilling flowers are worked the same way, no matter how many petals. 

Tip: you may want to tuck the very last wrap under previous layers for a neater finish. That makes the last wrap, on top, less obvious.

You can, of course, substitute baker's twine or craft thread for the quilling strips if you are a spirella traditionalist!

Make up the cards as you desire. I trimmed the backing paper with a
pinked edge to echo the triangle points of the quilled spirals and the zigzag decorations on the vase.

Stuff I used: 2mm-wide quilling strips from Past Times (on Amazon), patterned backing paper from Craft Creations, coloured cardstock from American Crafts.

Thanks, again, to patient Leah for taking the pics.


It is Mom's Day in America on May 12. This card would make a pretty greeting.