Puffy Star Ornaments
 |
| Three colourways. |
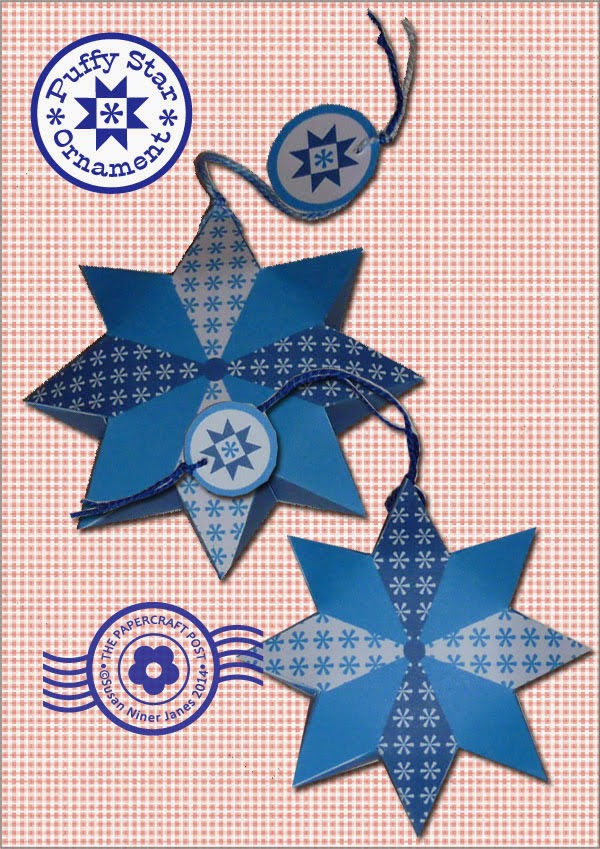 |
| Two sizes. |
Xmas on the 4th of July! Yesterday's project - using the same patchwork star motif - was a cinch. Today's 3-D patchwork stars are more challenging to make - in a good way. Each ornament is made of two interlocking pieces. It is fascinating to see how the star points join in a zig-zag configuration. And when you are done, you've got a very attractive decoration that looks just great either solo or in groupings.
Here are your printables-
Hand-cut:
PuffyStarsBlue.pdf
PuffyStarsRed.pdf
PuffyStarsGreen.pdf
PatchworkStarCharms.pdf
Digi-cut:
PuffyStarsBlue.svg
PuffyStarsRed.svg
PuffyStarsGreen.svg
PatchworkStarCharms.svg
I've given you two star sizes, with the print positioning different in each to add variety when grouped. The charms are the same as for the
Patchwork Star Matchbox Ornaments, so they will co-ordinate perfectly.
Now I'll talk you through the making-up:
 |
| Crease folds as above. |
Okay. You've got your two star pieces, front and back. Score the folds and crease them as shown in the pic above. All the folds are mountain folds, except for the little tabs at the base of the star-front triangles - these are valley folds... in the valleys between the star points.
 |
| Start at the top. |
Use tacky PVA glue to join the star together securely. Apply it with a cocktail stick. Start gluing at the star apex (where the hanging holes are). Make sure that you have positioned the front and back star pieces correctly, with a hanging hole to either side of the apex.
The stars join together in a zig-zag formation:
One side up, next side down, front to back, back to front - all around the star. Make sure that the little inter-star tabs are placed underneath the adjacent flap.
Pic above shows gluing an flap upwards. The adjacent flap has been temporarily folded back out of the way to allow clear access. (You can see one of the little triangular tabs just below the bent-back flap.)
Above, the flap that was bent back in the previous pic has been bent downwards and glued in place.
 |
| A look inside. |
Above, an inside view of the star (looks like a clamshell - or Audrey II).
I like to star gluing at the star apex, go partially the way around, then return to the apex and proceed in the opposite direction. I then complete the gluing at the bottom of the star. This ensures that the star
apex is all neat and tidy.
If you want to add the element of sound, pop a jingle bell inside before you've finished gluing.
Star's finished now. Just add the hanging loop and charm.
Remember that these Puffy Stars are designed to co-ordinate with the
Patchwork Star Matchbox Ornaments:


Another lovely design Susan.TFS.
ReplyDeleteWhat a treasure trove! I'm so glad you found my blog so I could find your ;-) I love paper crafting! Thank you for the great resources.
ReplyDelete