


The tray is a square bow-tied at the corners. Add a lid to make a box. Or, for a no-frills version, glue to lids together to make a bakery-style box.
Here are your free bandanna printables:
RedBandannaTray.pdf
RedBandannaLid.pdf
BlueBandannaTray.pdf
BlueBandannaLid.pdf


Bandanna Boxes & Trays
Bandanna Box
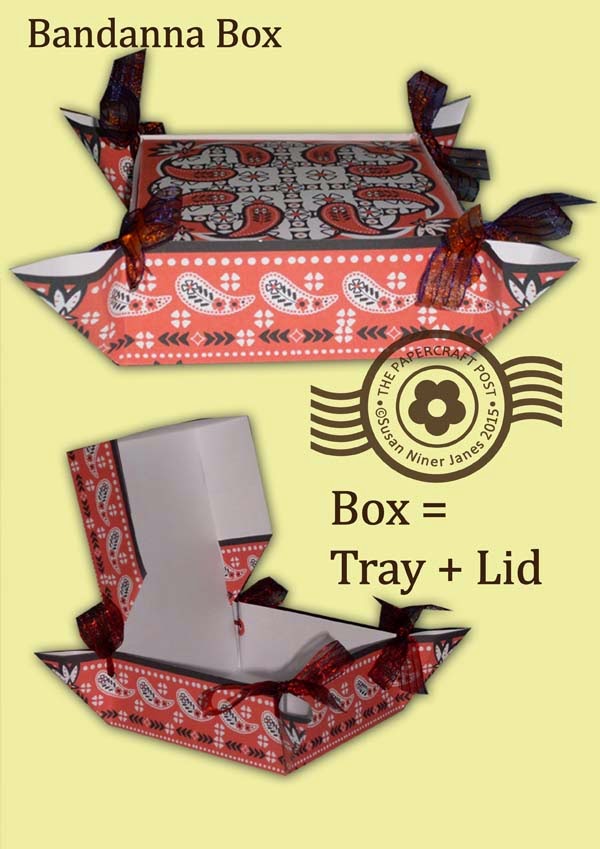
1 Print the designs on lightweight card. Score the fold lines using a fine-point embossing tool held against a small metal ruler. Remember the diagonal corner folds on the tray. Cut the slits in the box lid.
2 Punch the holes in the tray/base using a 1/8in circle handpunch. Glue reinforcements around the holes (the holes in the centre of the reinforcements are also punched with the handpunch).
3 Crease the folds - a bone folder makes nice crisp folds. For the corner ties on the tray base, you need 25-30cm (10-12in) of ribbon per corner. Thread the ribbon through the holes and tie into bows.
4 Assemble the box lid, gluing the front corners. I like to give the back corners a nice finishe with a diagonal turnback - this is your choice.
5 Glue the back of the box lid inside one side of the base. To close the box, the lid sides fit inside the box.
Bandanna Tray


No mess, no fuss, easy peel. Presto - almost-instant double-sided paper.
No-Frills Bandanna Box


No comments:
Post a Comment