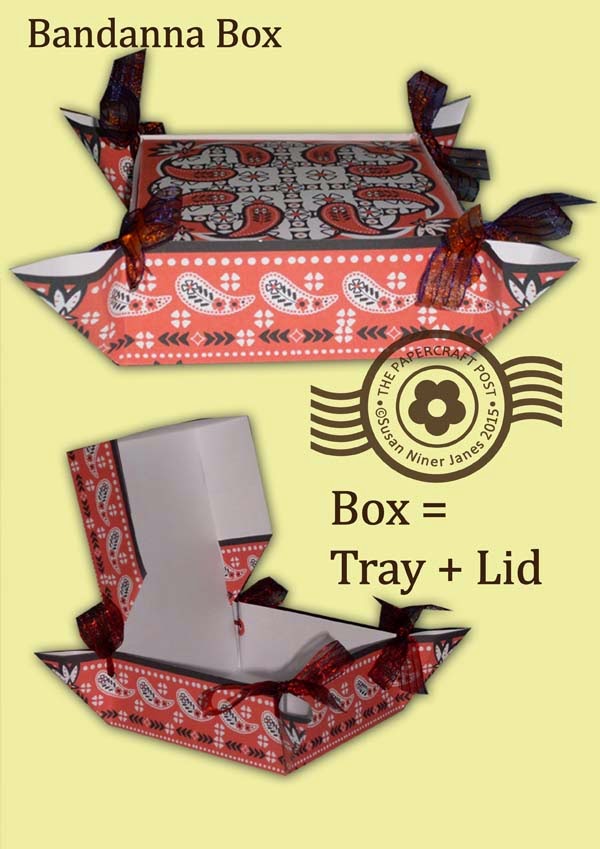
Prints are big this season, so get on the bandanna-wagon. Use these bandanna-inspired papercraft printable boxes/trays for gift giving or storage. They are easy to make and so very pretty.
The tray is a square bow-tied at the corners. Add a lid to make a box. Or, for a no-frills version, glue to lids together to make a bakery-style box.
Here are your free bandanna printables:
RedBandannaTray.pdf
RedBandannaLid.pdf
BlueBandannaTray.pdf
BlueBandannaLid.pdf
Bandanna Boxes & Trays
Bandanna Box
1 Print the designs on lightweight card. Score the fold lines using a fine-point embossing tool held against a small metal ruler. Remember the diagonal corner folds on the tray. Cut the slits in the box lid.
2 Punch the holes in the tray/base using a 1/8in circle handpunch. Glue reinforcements around the holes (the holes in the centre of the reinforcements are also punched with the handpunch).
3 Crease the folds - a bone folder makes nice crisp folds. For the corner ties on the tray base, you need 25-30cm (10-12in) of ribbon per corner. Thread the ribbon through the holes and tie into bows.
4 Assemble the box lid, gluing the front corners. I like to give the back corners a nice finishe with a diagonal turnback - this is your choice.
5 Glue the back of the box lid inside one side of the base. To close the box, the lid sides fit inside the box.
Bandanna Tray
The Bandanna Tray is made in the same way as the box base, only it is double-sided. Print out two trays and stick them back to back. How to do that? I recommend this genius easy option:
Stick It adhesive sheets
No mess, no fuss, easy peel. Presto - almost-instant double-sided paper.
No-Frills Bandanna Box
Simply glue two lids together, overlapping the back panel.
Enjoy making your Bandanna Boxes, whether you are making them to give or keep.
These little gift boxes make excellent grab-bag gift packaging, or are suitable as tabletop party favours. Add a hanging loop at the apex and you could even use them as tree ornaments. There's a box-within-the-box, so you can put a small gift in the bottom container and pop a choc on top for a double surprise.
Scandi Ski Sweater prints are big this season, so I went with that. The tags are optional. And, of course, either the pyramid or the mini-box can be used on its own.
Here are your free printables:
PyramidSurpriseBoxA.pdf
PyramidSurpriseBoxB.pdf
PyramidSurpriseBoxA.svg
PyramidSurpriseBoxB.svg
How-To:
The boxes are really quick and easy to make. Cut out the boxes, score the folds. Fold the folds - make the creases sharp! The "wings" on each triangle are folded to the inside of the box. Assemble the mini-box - just glue or d/s tape the adjacent tabs. To close the mini box, fold down one top flap at a time, tucking the last one in. The rounded corner of each flap goes on top. Pop the (filled) mini-box onto the base of the pyramid - no need to stick it down. To close the triangle, thread a tapestry needle with a length of Baker's Twine, pass it through the holes at the apex of the triangles. Draw the twine up, tie a bow. The gift tag is optional.
Enjoy making these festive gift boxes.
My Milk Carton binge continues. Today I have some fun lozenge-shaped gift boxes. I created the pattern template by placing two Milk Carton tops base-to-base. It's the apex-top of the milk carton that gives it its distinctive shape - and these cute mini-boxes have a double-dose.
The boxes are just about the right size for sweeties or trinkets.
Here are your free printables:
MilkCartonBonBonGiftRed.pdf
MilkCartonBonBonGreen.pdf
MilkCartonBonBonBlue.pdf
MilkCartonBonBonRed.svg
MilkCartonBonBonGreen.svg
MilkCartonBonBonBlue.svg
As you can see, I've given you a choice of gift tags.
Making the BonBons is pretty straightforward - just remember to score all the fold lines and crease them sharply. Don't forget the lengthwise fold across the BonBon centre. Take special care at the apex folds on the sides.
The BonBons would make good containers for small grab-bag gifts.