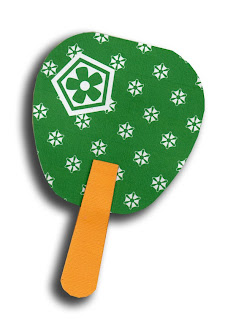
Simple to do. Print out the designs, cut them out, glue the fans together. The "secret" is a middle layer of chipboard.
The decorative patterns on the fan are inspired by origami paper.
Here's a pic of what each download looks like:
The white gap in the paddle base is for positioning the handle. But if you prefer to use your own lolly-stick-type wooden handles - like the ones used for wedding fans, just un-group the fan paddle design and remove the white gap. (That advice is for you digi-cutters out there.)
Here are your free fan downloads:
PaddleFanA.pdf
PaddleFanA.svg
PaddleFanB.pdf
PaddleFanB.svg
PaddleFanC.pdf
PaddleFanC.svg
To make the fans:
1. Cut out all the pieces by hand (.pdf) or digitally (.svg, .studio). For each fan, you need to cut out two printed fan paddles, two printed fan handles. From chipboard, you need one fan paddle and two fan handles.
2. Glue a printed paddle fan onto either side of a chipboard fan. To do this, apply tacky glue around the outer edges of the chipboard - also a bit in the centre. Use a cocktail stick applicator. Smooth the paper on with edges aligned. Colour the white edges of the paddle fan with a felt tip in a matching colour.
3.For each side of the handle, glue a printed handle onto a chipboard handle and colour the edges with a yellow felt tip.
4. Apply d/s tape to the marked area on the fan front and stick the top of the handle on within the indicated area. Turn the fan over. Apply d/s tape all along the remaining fan handle (you may prefer to glue). Stick on the second fan handle, with edges aligned, and wrong sides facing.
All finished!
You can make these fans up quickly in quantity.


