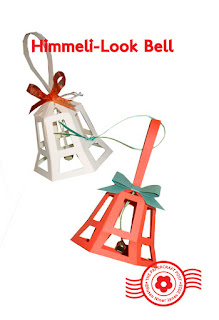
The Himmeli-look-alike binge continues. The look of Finnish strawcraft... in paper! Today I'm walking you through the Himmeli-look bells. They are much easier to make than they look. Once you cut out and crease the pieces, they almost make themselves. It looks like there's a lot going on, but each bell only has three pieces (not counting the jingle bell clapper or optional bow).
Here are your free downloads:
HimmeliBell.pdf
HimmeliBell.studio3
HimmeliBell.svg
Himmeli-Look Bell
1 See - only three pieces! Cut out the pieces. Score and crease the folds as shown.
2 To assemble the bell body, glue the adjacent tabs - tahdah - dome shape. Bend the handle with a soft fold at the top. Glue it together just above the base folds. Glue the little hexagon underneath the handle to stabilise the join.
3 Time to attach the clapper. Thread a jingle bell onto a piece of craft thread. Knot the thread to mark the height of the bell drop (about 4.5cm/1-3.4in). With jingle bell inside, tie thread tails as shown, on opposite side of bell. Knot the thread ends at centre top, and tie another knot around the first knot to secure. Trim the thread ends.
4 Next, glue the handle onto the bell top. The v-shaped tabs on the handle match those on the bell top - take care to align the edges.
5 Add a bow at the handle base. Your choice - ribbon or paper! If you want a paper bow, find one here. (Reduce the size of the bow to fit the bell.)
All done. Now you can deck the halls!


No comments:
Post a Comment