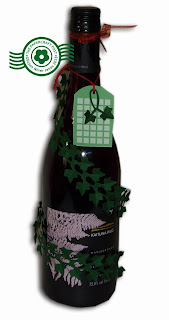
There are downloads for the bags and garlands, plus a mini-tut on the garlands.
Here are your files:
IvyGarland.pdf
IvyTrellisGiftBagSmall.pdf
IvyGarland.svg
GardenTrellisGiftBag1of2.svg
GardenTrellisGiftBag2of2.svg
IvyTrellisGiftBagSmall.svg
About the gift bags: The bigger-sized gift bag is pieced. The bag handle reinforcements are optional. Glue them behind the handles (with glue stick) if you think your paper choice is a little flimsy. Score the folds, then crease with a bone folder. Join the "seam" - it goes at the back. For the bag base, fold in the side flaps first, then slip the tab into the slot. You can glue the tab for a secure seal. If the bag contents are heavy, line the base with a paper rectangle a smidge smaller than the size of the slotted base.
Tie one end of the garland onto the bag handle. Secure the other end with a small Dodz sticky dot by 3-L.
Ivy Garland Mini-Tut
1. Cut out the ivy loopy links-it is best to use double-sided green paper - looks more realistic. But you can print-and-cut if you prefer. Crease each leaf in half to make a centre vein. For a nice, crisp fold: score first with an embossing tool held against a metal straightedge.
2. Link the loops. The loop end is inserted from underneath the previous loop. Very important!
3. Next, slip the inside edge of each ivy leaf on top of the previous loop. That's it! Repeat to make an ivy garland of the desired length.
 |
| Ivy Garland |
 |
| A vine for the wine! |


Fabulous garland & bags. Thank you & also thanks for telling us how to put it all together.
ReplyDeleteGood gift bags and nice preparing.
ReplyDeletehttp://www.packagingspecialtiesonline.com/gift-boxes-bags/